.JPG) |
| Card 1 |
|
|
|
|
This card was copied almost exactly from cards I saw
here. I changed the punch used for the buckle. I think the sentiment from the
Just Believe set is perfect for this card!
Supplies:
sets - just believe, sassy salutations
cs - real red 8.5 x 5.5", blk 4.25 x 1" belt and scraps for buttons, wh 3.75 x 5' guts and beard, champagne or silver glimmer paper
ink - blk and real red pads
access - jolly jingles jumbo wheel (for env), big shot and apothecary accents framelits
punches - 1/2" circle, 1" sq, curly label
Notes:
- Punch out the square and center the curly label punch over the hole to create the buckle.
- Adhere the blk belt across the red card; then adhere glimmer buckle on top and the blk belt will show through the 1" sq opening.
.JPG) |
| Card 1 - inside |
.JPG) |
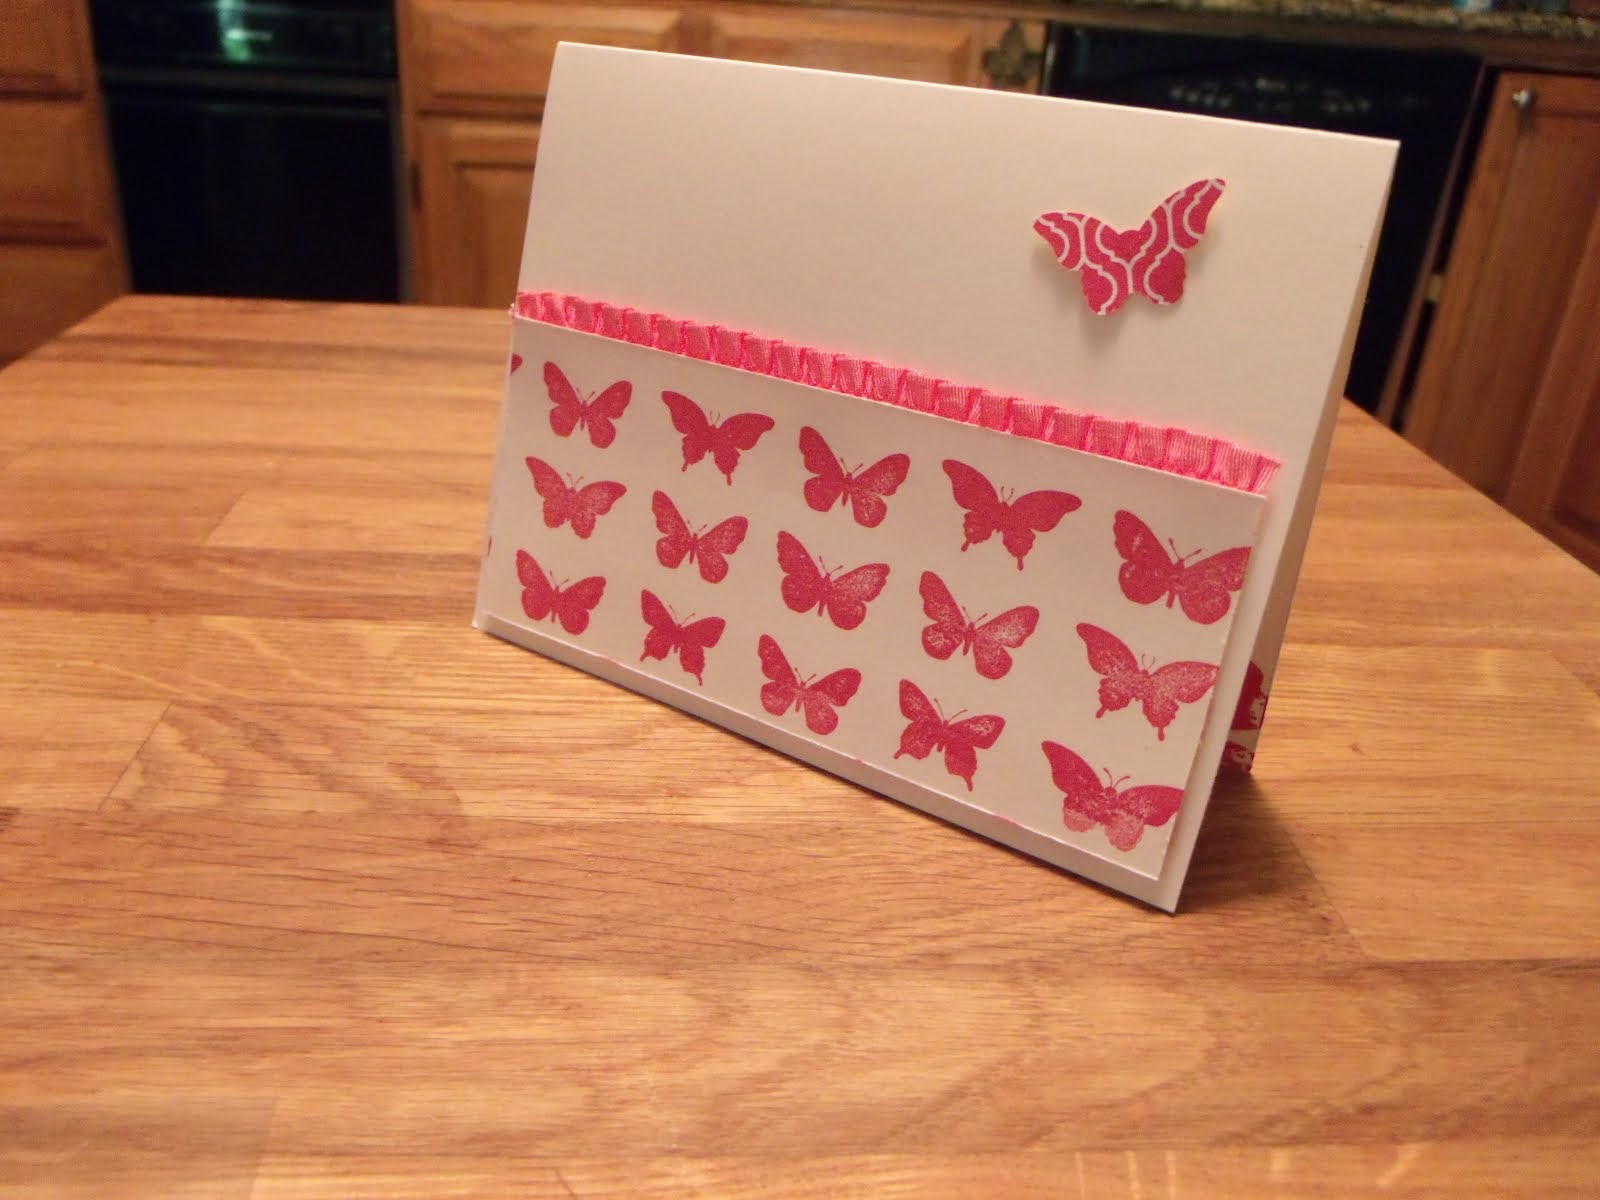
| Card 2 |
|
I was inspired to create this card by
this card Tammy, gave me.
The inside was inspired by my friend Cheryl's design. I like the way she used the punch out on the inside.
Supplies:
sets- curly cute
cs- wh 5.5 x 8.5", raspberry ripple, 5 x 3.75", bs multi purpose adhesive sheet 2" sq
ink- raspberry ripple pad
access- bs & lacey brocade TIEF various ribbon scraps, corner rounder, ornament punch. dazzling diamonds glitter
.JPG) |
| Card 2 - inside, the ornament punch out is textured |
.JPG) |
| Card 3 |
I made
this Christmas card and have a gazillion oval punch outs, so I designed the third card to use up some of them.
Supplies:
sets- watercolor winter, delightful dozen
cs- cherry cobbler 4.25 x 11", vanilla 3.75 x 5" guts and extra large oval punch out
ink- early espresso and garden green pads, rose red marker
access- bs and oval holiday frame TIEF, sponge, dimensionals, aquapainter, corner rounder
.JPG) |
| Card 3 -inside |
.JPG) |
| Card 4 - option A |
This card was inspired by a card I saw by Krista Fenton on Stampin' Connection, an exclusive site where demonstrators share cards, videos, etc. It's so simple! I made a bunch of the birthday ones for male family members who have Dec b-days.
Supplies:
sets- watercolor winter, bring on the cake, teeny tiny wishes or peaceful season (retired hostess set)
cs- confetti cream 5.5 x 8.5" and 4.25 x 2.75" (retired, but you can substitute naturals ivory)
ink- chocolate chip and always artichoke pads
access- sponge, dimensionals
.JPG) |
| Card 4 - option A inside |
.JPG) |
| Card 4 - option B |
.JPG) |
| Card 4 - option B inside |
.JPG) |
| Card 5 |
I fell in love with this set. I think I'll make this card for next year. I thought it would be pretty to do the stained glass technique on the main image (
click here to view a card and info on the technique)
Supplies:
sets- christmas blessings
cs- cherry cobbler 8.5 x 5.5", vanilla 4 x 5.25" guts, 2.5 x 3.5" and scraps for punching
ink- cherry cobbler pad
access- sponge, dimensionals, decorative label punch, bs and petals-a-plenty TIEF
.JPG) |
| Card 5 - inside |
.JPG) |
| Card 6 - Money Card |
.JPG) |
| Card 6 - Money Card - inside |
The final card was copied almost exactly from Barb Mulikin. She said she makes a lot of these money cards. I can see why because they are quite easy.
Supplies:
sets- tags 'til christmas
cs- cherry cobbler 6.5 x 9.5", chocolate chip 2.75 x 6.25", be of good cheer dsp 2.5 x 6" vanilla scraps for punching
ink- gumball green cherry cobbler and chocolate chip markers, chocolate chip pad
access- 24" cobbler tulle ribbon, sticky strip, dimensionals
punches- scallop square, decorative label
Notes:
- score the cobbler base card at 3-1/8" and 6.5"
- fold it up and cut the shortest flap on the diagonal
- add sticky strip to the wide edge of that flap to create the money pocket
Have a very Merry Christmas! Mary
.JPG)
.JPG)
.JPG)


.JPG)
.JPG)
.JPG)
.JPG)
.JPG)
.JPG)
.JPG)


.JPG)
.JPG)
.JPG)
.JPG)
.JPG)
.JPG)
.JPG)
.JPG)
.JPG)
.JPG)
.JPG)
.JPG)
.JPG)
.JPG)