Supplies:
sets- none
cs- wisteria wonder, concord crush, whisper white
ink- none
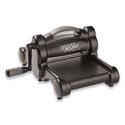
access- big shot, mini milk carton die, stripes embossing folder, crop-a-dile, sticky strip, dimensionals, liquid glue or two way glue pen, pearls, heart to heart punch pinking hearts border punch, small oval punch, 2-1/2" circle punch
 Start by cutting out 2 of the Mini Milk Carton die. I save card stock by only cutting out three panels, being sure to include the side tab on each piece. Note: If you cut out the full milk carton die you will need to cut off the panel without the side tab on both pieces.
 Score the center panel of both pieces to match the outer panels (upside down "v"). I found it easiest to use a ruler and my bone folder.
 Add sticky strip to the side tab of each piece on the outward facing side (right side). Add sticky strip to five of the bottom flaps on the inward facing side (wrong side).
 Remove the protective layer of the sticky strip and adhere the two "milk boxes" together so you now have six panels.
 Using your Crop-a-dile, punch 1/8" holes just above the narrow scored line at the top of the box. You can fold over the card stock and punch two at a time. You'll have to punch the last two after the final tab is adhered (forming the cylinder).
 If you are decorating the six panels, it's easiest to do that now while you still have a flat shape. If you are going to add a single strip of dsp that wraps around the entire box (about 1-3/4 x 11") you can do it after the box is formed.
 Adhere the other side tab to make a cylinder.
 Turn your box upside down. Being careful to keep the hexagon shape, fold in and adhere the bottom flaps. Start with the flap that has no sticky strip on it and the flap opposite that one. Continue with the flaps that are opposite each other, lining them up parallel and overlapping the ends about 1/4" helps keep the hexagon shape.
 Weave some kind of string or ribbon through the holes to close your box. I used Wisteria Bakers twine, about 24", but the 1/8" taffeta ribbon works well, too.
 I used the handle for the Sweet Pressed Cookie stamps from SU to press a 2-1/2" circle into the bottom of the box for added strength and a cleaner look.
Happy Stamping! Mary


No comments:
Post a Comment