Tuesday, January 25, 2011
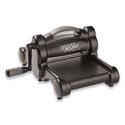
Sale-A-Bration is Here!
Spend: You will receive a free Sale-A-Bration product for every $50 you spend (before tax and shipping)!
Host: A hostess will receive a free Sale-A-Bration product for every $300 in workshop sales*, in addition to our regular hostess benefits!
*Note: This benefit is only available on qualifying customer, demonstrator, and workshop orders. Online orders do not qualify.
Join: New recruits will receive 15 percent off their Starter Kit (Standard or Digital+), plus a special Sale-A-Bration bonus bundle valued up to $50!
This is a great time to book a workshop. The first erson to hold a workshop during SAB with at least 6 guests will earn an extra $25 in free merchandise from me! So call me today.
Also, if you send in a SAB order ($50 net) by Fri. 1/28/11 I will enter your name in a drawing to receive a special prize.
Happy Stamping! Mary
Sunday, January 23, 2011
3-D Magnolia Flower
I made these 3-D Magnolia Flowers last May and I am finally having two stamp camps this week to make them (and a box similar to this one, but more elegant) and 4 awesome cards. I can't wait!
I still haven't been able to upload photos and I really want to show you the great cards we made at our Inkerbelles Demonstrator Get Together on Sat. I'll try to get it worked out in the next couple days.
Tomorrow my 14 year old is finally getting his braces off after 5 years! It's going to be a great day for him.
Happy Stamping! Mary
Monday, January 10, 2011
Valentine Scallop Square Boxes
edit: I am finally adding a photo of the scallop square boxes that I gave my club members in January. The photo is of the box sitting on the scallop square bigz die.
We had a lot of fun at Club yesterday (see yesterday's post for the projects we made). I gave each of the gals a little box with a couple mint patties. I had seen this idea on Monika's blog. I won't go into all the details because you can view her easy tutorial here. I used 12" x 12" red card stock and was able to cut four scallop squares out of each sheet. Then I punched out some retired designer paper with a 1" circle to decorate the sides (you could easily punch out various hearts or simply stamp the sides). I punched out more dp circles and glued them on red card stock punched circles (1-1/4") to decorate the mints. My camera and computer are conspiring against me. They won't let me upload the close up photo of the box I made. When I do manage it, I will edit this post. Thanks for stopping by!
Happy Stamping! Mary
Friday, January 7, 2011
January Club Projects
Project 1 - Gift Card Holder
This is an updated version of a Club Card I did a couple years ago. I've seen these gift card holder many times. I can't remember where I first saw it years ago, but I changed the dimensions to make a regular A-2 card size (the one I originally saw was barely larger than a gift card). I also made it with 8-1/2 x 11" card stock sheets since I don't have 12 x 12" in many colors. Here's a great
tutorial by Ruth Norton showing how the gift card holder is made, but using 12 x 12" card stock.
Supplies:
sets- always, sincere salutations
cs- sahara sand, textured black, rose red, very vanilla
ink- rose red craft pad, always artichoke, so saffron, marina mist & regal rose classic pads
access- word window & 1" circle punch, corner rounder, sticky strip, clear ep, 1/4" wide black gg ribbon, dimensionals
Project 2 - Pop-Up Valentine Card with Removable Bookmark
It's so easy and fun to make these Pop-Up Cards! I learned how from SU's website tutorials about four years ago. I even made an Easter card version with my first grade students! If they can do it, I know you can, too. The key is to attach the inside card ONLY at the top and bottom. Then it won't buckle when you open and close the card. Click here for directions.
I like Anne's tutorial on how to punch around the page using SU's border and corner punches.
Supplies:
sets- i (heart) hearts, grateful greetings
cs- real red, very vanilla, red glimmer paper, love letters designer paper
ink- real red pad
access- brights glimmer brads, 1/16" punch, pinking hearts corner & border punches, heart to heart & full heart punches, two-way glue pen
Happy Stamping! Mary
Wednesday, January 5, 2011
Jessie, Home from Japan
Jessie holding up a her school's address written in Japanese.
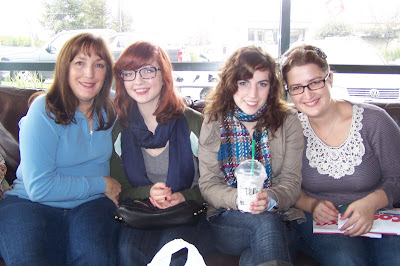
Here's my sis and 3 of my nieces: Alice, Esther, Teri, Jessie
Jessie and Me
My niece goes back to college in Hawaii later this week. I drove out to Tracy to visit with her and my sis and a couple of my other nieces, too. I didn't have a lot of time, but I'm so glad I went. I got to see a bunch of her photos of Japan, where she's been studying. She is getting really good at speaking Japanese! After she graduates she plans on returning to Japan to teach English and learn to speak Japanese even more fluently. Good luck Jess!
Mary
Tuesday, January 4, 2011
Too Cool for Snow
The boys are ready for a day of snowbording!
We went to my inlaws' vacation home at lake Shasta the week after Christmas. We woke to snow on New Year's Morning - so pretty! I finished reading two books, went to the movies with the family, and played games.
Since I was alone at the house for two days (while Dave took the boys snowboarding), I could have done a lot of stamping! I didn't have time before I left to put together a stamping project though. Alas, I got a stamping break instead.
Now I'm ready to stamp! I have clubs and classes partially planned, so check back for sneak peaks!
Happy Stamping! Mary
Subscribe to:
Posts (Atom)